



Master Adobe Photoshop in 43 Minutes: A Beginner’s Guide to Professional Editing

Stepping into Adobe Photoshop for the first time can feel like walking into the cockpit of a fighter jet—there are buttons, sliders, and panels everywhere, and one wrong click feels like it might crash the whole system. However, mastering this powerhouse software is the gateway to professional graphic design, photo retouching, and high-converting YouTube thumbnails.
This guide, based on over a decade of professional experience from the creator Bog, breaks down the complexities of the 2026 version of Photoshop into a manageable, project-based workflow. Whether you are a total novice or a self-taught editor looking to fill in the gaps, this deep dive explains the who, why, and how of professional image manipulation.
The Fundamentals: Navigating the Interface
The first step to mastery is understanding your surroundings. Photoshop’s layout is divided into four primary zones:
- The Tools Panel (Left): Your “utility belt” containing brushes, selection tools, and erasers.
- The Menus (Top): Standard file and filter operations.
- The Options Bar (Below Menus): These settings change dynamically based on which tool you have selected, allowing for fine-tuned control.
- The Layers Panel (Right): Arguably the most important area, where you manage the stack of elements that make up your image.
Why Layers are the Secret to Great Design
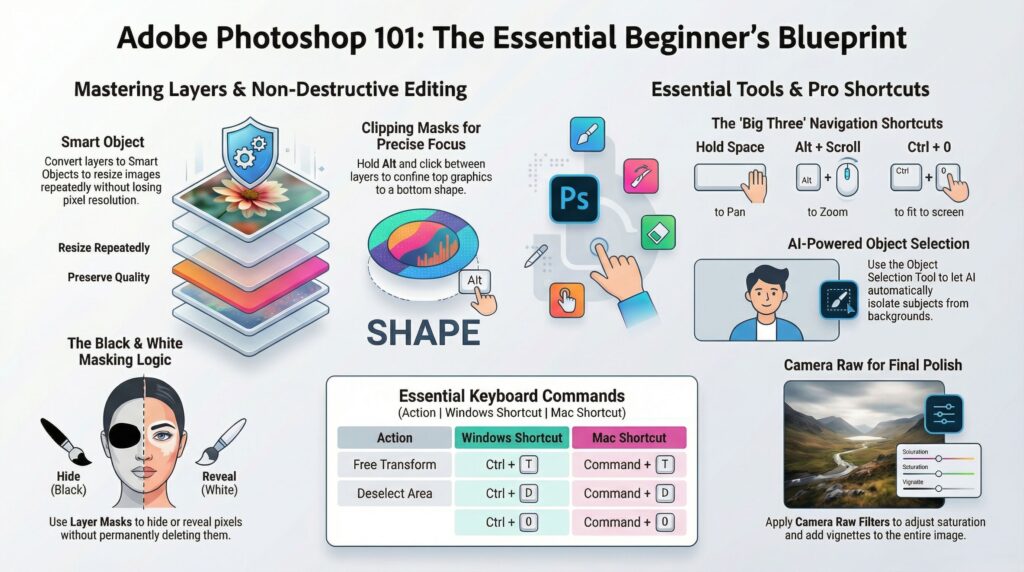
In Photoshop, think of your project as a stack of transparent glass sheets. When you paint on a top layer, it covers what is beneath it; if you move that layer down, the objects above it take precedence.
To keep your work “non-destructive”—meaning you can always go back and change your mind—never edit directly on your original image. Instead:
- Add New Layers: Use the “+” icon in the layers panel to create a fresh canvas for every major change.
- Adjust Opacity: You can fade a layer’s visibility to blend effects naturally.
- Use Masks: Instead of erasing pixels (which is permanent), use a Mask. In a mask, black hides pixels and white reveals them, allowing you to “erase” and “un-erase” with total flexibility.
Selection Tools: From Freehand to AI
Selecting specific parts of an image is a core skill. The tutorial highlights several methods depending on the complexity of the object:
- Marquee Tools: Best for simple rectangles or circles.
- Lasso Tools: Use the standard Lasso for freehand, the Polygonal Lasso for sharp corners, or the Magnetic Lasso, which snaps to the edges of an object automatically.
- Object Selection Tool: This AI-powered tool analyzes your image and creates a selection around the subject with a single click.
- The Shortcut: Pressing
Ctrl + D(orCmd + Don Mac) is the essential command to “deselect” and clear your current selection.
Quality Control: The Power of Smart Objects
A common mistake for beginners is resizing an image only to find it has become a pixelated mess. Bog refers to this as the “Minecraft potato” effect. When you shrink a standard layer and then enlarge it, Photoshop loses the original pixel data.
The solution? Smart Objects. By right-clicking a layer and converting it to a Smart Object, you protect the original quality, allowing you to resize it infinitely without losing a single pixel of detail.
Retouching and “Healing” Images
If you need to remove blemishes or distracting spots, the Spot Healing Brush (Shortcut: J) is your best friend. By painting over an imperfection, Photoshop intelligently samples the surrounding area to blend it away.
- Pro Tip: To adjust your brush size on the fly, use the bracket keys
[and]or holdAlt + Right Clickand drag your mouse.
Step-by-Step: Recreating a Professional Thumbnail
The basis of professional learning is practical application. To create a standard YouTube thumbnail, you should:
- Set the Canvas: Start with a 1280×720 pixel document.
- Solid Color Background: Instead of painting a background, use a “Solid Color” adjustment layer so you can change the color at any time.
- Clipping Masks: This advanced technique allows you to “clip” one layer to the shape of another. This is perfect for ensuring a logo or image stays perfectly within a specific border.
- Layer Styles: Double-click a layer to add “Drop Shadows” or “Strokes” (outlines). This adds depth and makes your subjects pop off the screen.
The Final Polish: Camera Raw Filter
Before exporting, professionals use the Camera Raw Filter. This acts like Adobe Lightroom inside of Photoshop, allowing you to boost saturation, adjust exposure, and add a “vignette” to darken the corners of your image. This draws the viewer’s eye toward the center of your design.
Conclusion: Exporting Your Masterpiece
When your work is done, use the shortcut Alt + Shift + Ctrl + W to “Export As”. For the web, PNG is often the best format to maintain high quality.
Learning Photoshop is a journey of muscle memory and keyboard shortcuts like V (Move), B (Brush), and Ctrl + T (Transform). By following these principles of non-destructive editing and smart object management, you are no longer just “clicking buttons”—you are creating.

